Iron Glaxy Art Test: Breakdown
For this project I was given a great opportunity to take an art test for Iron Galaxy.

Day 1: Reference and Blockout
The first step in my process was to gather reference and get an understanding of what I am modeling. During my reference gathering phase I set up a few questions to ask myself:
- How old is the asset?
- What was the primary function/purpose?
- What materials were used to create it?
- Where is the asset located?
With these core questions in mind, I gathered a small pool of reference. My reference covered my core questions as well as a quality benchmark examples for my final deliverables. (By the end of the project my mood board will be broken down into sub sections depending on detail, story telling, and presentation)
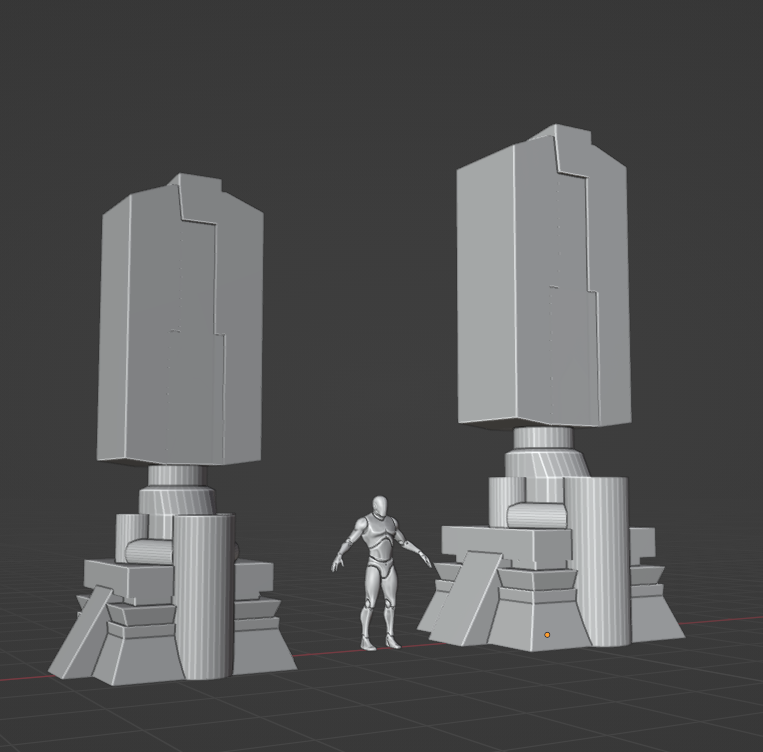 |
| Blocking out scale and shape language |
With the blockout completed, I took some time to get my pieces set up in Zbrush and do a first pass on materials. I wanted to have as much versatility as possible by keeping the parts separated. It will allow me to sculpt each piece individually with ease when I start re-topologizing.
 |
| Exposed pieces |
 |
| Gold First Pass |
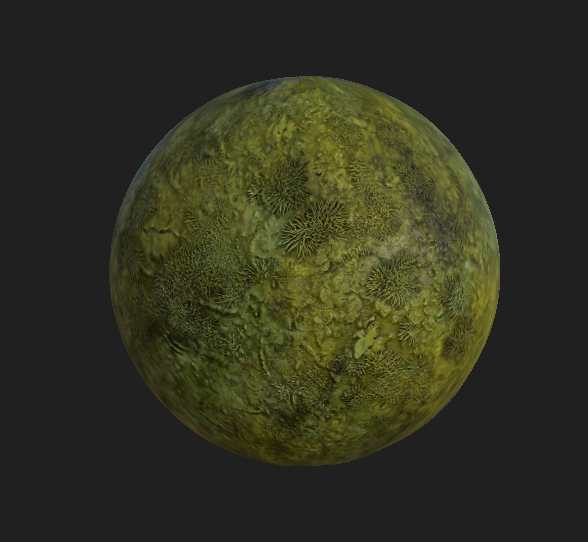 |
| Moss First Pass |
Day 2: Highpoly and Materials
A new day, more progress! Starting off with a second pass on materials. Getting a look with fresh eyes will help me see what works, what doesn't, and what is needed. The moss felt a bit too dark so I did another pass to increase saturation. The gold was a bit yellow as well so I toned down the hue and saturation. The stone statue I made was based off of basalt stone. I applied my materials to the Unreal Mannequin to see how the materials would be affected on curved objects.


1: Fully constructed (new)
2: Aging/ Weathering
3. Overgrowth
2: Aging/ Weathering
3. Overgrowth
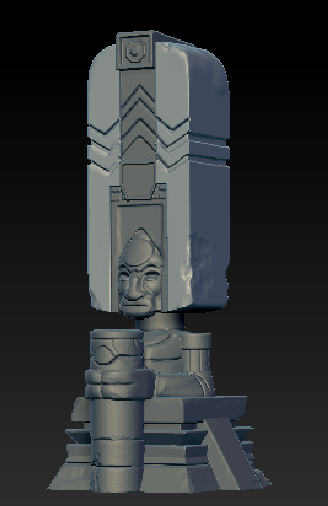 |
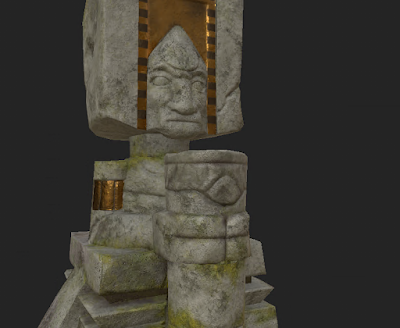
| Final Sculpt |
Keeping the materials and location in mind I wanted the statue to feel smooth but hand carved. After the initial construction, the next phase would be to add natural weathering and aging. In the amazon there is constant rain and I wanted to present that with pitting. With water dripping on top of the statue as pitting would eventually form.
 |
| Water damage from build up |
The statue needed a bit of aging which is done by adding cracks and pieces of stone that would eventually fall off over time.
Lastly I wanted to focus on overgrowth. During this phase I constructed the vines to lock the statue in place. The goal was to have the vines and roots intertwine with the statue and create a natural grip at the base and in certain damaged areas.
 |
| Vines Front |
 |
| Vines Back |
Day 2: 14 hours
Day 3: Lowpoly and Foliage
After retopologizing my asset I turned my attention to the foliage. The asset was completed but I wanted some grounding elements at the base of the statue. Having the foliage at the base will allow me to set dress my asset, tell a story, and break up the transition between the base and asset.
I didn't want anything too complex so I modeled 2 leaves to be baked into substance designer. Time was beginning to be very limited so I focus on large noticeable shapes. After baking down the texture, I created a grass map to buildup around the base of the statue. Today I wanted to retopologize my highpoly and make it an optimized game asset. For this process I used Maya's quad draw tool to manually retopo the statue. With my 4k poly limit, I wanted to use majority of my polys on the statue. Any additional polys would go into the root structure retopo. Initially I wanted two root/vine system but, the poly count was over submission guidelines. My solution for my dilemma was to use the vines that were visible, pleasing to the structure, and pleasing to the silhouette.
 |
| Lowpoly (left) Highpoly (right) |
After retopologizing my asset I turned my attention to the foliage. The asset was completed but I wanted some grounding elements at the base of the statue. Having the foliage at the base will allow me to set dress my asset, tell a story, and break up the transition between the base and asset.
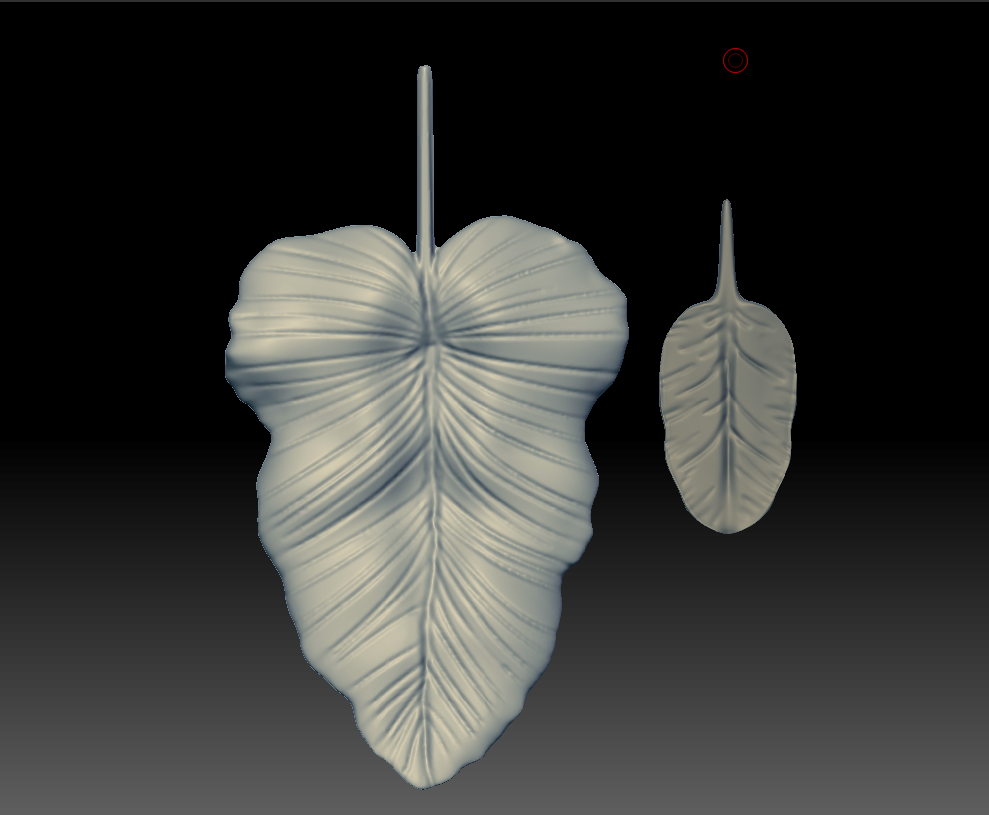 |
| Leaf sculpt |
 |
| Atlas Map |
With my atlas map created, I took my textures into blender and created a foliage kit. The foliage
 |
| Foliage Kit |
Day 3: 12 hours
Day 4: Baking and Texturing
To kick start the texturing phase I wanted to do a test bake in marmoset. The test bake allowed me to look for stretching, artifacting, and any errors in the bake.
 |
| Test Bake from Marmoset |
With a bit of trial and error, I managed to get my bake to a good spot to export to substance painter. I also imported my custom textures into my painter file to start a foundation for my texturing process. With my textures imported, I assigned my materials and started working. Looking over my reference, I started with adding some dirt buildup at the base and crevasses.
 |
| Dirt Buildup |
Next, I focused on the gold areas. After applying my material, I added a "grunge layer" and a "dusting layer" to do a wear pass.
 |
| Gold wear |
Lastly I did a moss pass in crevasses and areas were rain would not wash away the moss.
Day 4: 12 hours
Day 5: Documentation
Last day of the challenge! For my last day I fixed any noticeable errors in my asset then gathered the files needed for this project.I also wanted to fully assemble the asset for screenshots. The roots were not grounded and I wanted to add a base with a smooth transition. One thing that popped into my mind for a possible solution were the dioramas from Star Wars: Battlefront.
 | ||
| Display Reference To fully show the asset was located in the jungle, I created a base for the asset to rest on. The base would be a masked out jungle floor material with some height variation. Another element I wanted to add were a few mud puddles and dead foliage.
|

 |
| Foliage and Base |
 |
| Lighting Test |
With all my hard work I took the final screenshots for submission


Comments
Post a Comment